Building a landscape and 3D objects out of nothing but triangles
The entire Lander screen is made up of just four main elements: the landscape, 3D objects, particle and the score bar. The score bar is plain old text that is printed to the screen by the operating system's OS_WriteC routine; and the particles are poked into screen memory one byte at a time when the graphics buffers are drawn (as described in the deep dive on depth-sorting with the graphics buffers).
That leaves the landscape and 3D objects, both of which are entirely composed of triangles (some quite obviously, some less so, as in this screenshot):
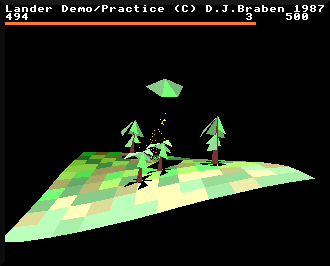
In the case of the landscape, each square tile is drawn as two adjacent triangles; there is a DrawQuadrilateral routine, but it's nothing more than a simple wrapper that calls the triangle routine at DrawTriangle twice. And for 3D objects, all faces are defined using three vertices, so rectangles like the sides and roof of the building object are also composed of triangles (see the deep dive on object blueprints for details).
In this deep dive we take a look at Lander's triangle-drawing routine, but before we get stuck into the biggest single routine in the whole codebase, we need to talk about horizontal lines.
Drawing horizontal lines
------------------------
Lander's triangles are all filled triangles - there are no wireframes in this game - and as you would expect, each triangle is drawn as a series of horizontal lines. We use horizontal lines rather than vertical or diagonal lines because they are quick to poke into screen memory, particularly when the screen memory is laid out in continuous pixel lines like the Archimedes screen (see the deep dive on screen memory in the Archimedes for details).
Lander's DrawHorizontalLine routine is responsible for drawing all of the game's many horizontal lines. Because it is such a core part of the game's graphics engine and is called upon an awful lot, the routine contains some basic optimisations for drawing shorter lines. Specifically, short horizontal lines of 0 to 17 pixels in length are drawn by the DrawLineSegment routine, which consists of a simple sequence of STRB instructions, each of which pokes a single pixel into screen memory. There's a jump table in lineJump that contains the addresses of all the different entry points in DrawLineSegment, and the logic at the start of DrawHorizontalLine checks the line length, and if it is in the range 0 to 17 pixels, it jumps to the relevant entry in lineJump. This means we join DrawLineSegment at the correct point to poke that many sequential bytes into memory, thus drawing a horizontal line of the specified length.
For longer lines of at least 18 pixels, DrawHorizontalLine draws the line in three parts: the left cap, the middle portion, and the right cap. Here's the process:
- If the left cap contains 1, 2 or 3 pixels, draw those pixels.
- Draw the portion of the line between the left and right caps, drawing it one word (four pixels) at a time.
- If the right cap contains 1, 2 or 3 pixels, draw those pixels.
This part of the routine contains a good example of how ARM's conditional suffixes and write-back features can radically simplify code. For example, the first step requires just six instructions, with one pair for each pixel:
  TST     R11, #%00000011
  STRNEB  R8, [R11], #1
  TST     R11, #%00000011
  STRNEB  R8, [R11], #1
  TST     R11, #%00000011
  STRNEB  R8, [R11], #1
See the DrawHorizontalLine routine for commentary about how this works in detail, but essentially each TST is checking the screen address in R11 to determine whether we need to draw a pixel, and then the STRNEB instruction draws it if required, updating R11 to point to the next pixel along as it does so. The right cap also requires only six instructions, and even the loop for the middle part is pretty minimal at only five instructions.
Compare this to Elite's HLOIN routine, which implements exactly the same algorithm, but using lookup tables, multi-byte variables, character blocks and a lot more code. Sure, the Elite routine also contains code to calculate the screen address from the line coordinates, but even that is easier in ARM; see the deep dive on screen memory in the Archimedes to see how we can do that part in just three instructions.
Now that we know how to draw horizontal lines, let's look at how Lander draws triangles.
Drawing triangles
-----------------
The DrawTriangle routine is a bit of a beast. I've broken it down into 11 parts in the source code, and even then some of those parts can feel endless. Luckily the core algorithm is not too complicated, and the routine is only large because that algorithm is duplicated (with minor tweaks) for a number of edge cases. In this deep dive we'll concentrate on the process for drawing a fairly standard triangle, but it's essentially the same for all the variants.
Specifically, we're going to look at how Lander would draw a triangle like this, where the triangle is fully on-screen and doesn't have a horizontal bottom edge:
                          _,+
                      _,-´ /
                  _,-´    /
              _,-´       /
            +´          /
             `.        /
               `.     /
                 `.  /
                   `+
This kind of triangle is drawn by the first four parts of DrawTriangle, and we'll analyse the algorithm in a moment. The other seven parts of the DrawTriangle routine specialise in triangles that either have a horizontal bottom edge, or which don't fit fully on-screen (or both). Specifically:
- Part 5 does all the calculations for the triangle when it's fully on-screen but has a horizontal edge between (x1, y1) and (x2, y2), jumping to part 4 to do the actual drawing.
- Parts 6, 7, 8 and 9 do all the calculations for triangles that are that are partly off-screen, jumping to part 11 to do the actual drawing.
- Part 10 does all the calculations for the triangle when it's both partly off-screen and has a horizontal edge between (x1, y1) and (x2, y2), jumping to part 11 to do the actual drawing.
- Part 11 draws triangles that are that are partly off-screen.
For now, though, let's forget about all the edge cases and concentrate on how to draw our standard triangle above.
Calculating the slopes
----------------------
The first step in DrawTriangle is to check whether the triangle is off-screen, and if it is, jump to part 6 to draw a clipped triangle (which we won't cover here, but it's a very similar approach).
Next, we order the three triangle coordinates. The coordinates passed to the routine are all screen coordinates, so we order them so that (x1, y1) is at the bottom of the triangle (with the highest y-coordinate) and (x3, y3) is at the top (with the lowest y-coordinate).
Let's look at our standard triangle again, with the coordinates in the correct order:
                             (x3, y3)
                          _,+
                      _,-´ /
                  _,-´    /
              _,-´       /
  (x2, y2)  +´          /
             `.        /
               `.     /
                 `.  /
                   `+
                  (x1, y1)
We now move on to part 2 of DrawTriangle, where we calculate the slope of the bottom-left edge of the triangle, i.e. the gradient of the line between (x1, y1) and (x2, y2). The calculation is fairly simple to write down, but rather harder to implement:
(y1 - y2) / (x2 - x1)
The first step in doing this calculation is to check whether the two points share the same y-coordinate; if they do then the triangle has a horizontal bottom edge, and in this case we would jump to part 5 to deal with this specific type of triangle (again, this uses a pretty similar approach to the normal routine, it just takes the horizontal edge into consideration).
For our standard triangle though, y1 > y2, so we keep going with the calculation above. The numerator in our division, (y1 - y2), is the vertical distance between the points, while denominator, (x2 - x1), is the horizontal distance, so dividing them gives us the gradient of the line's slope.
We know that y1 > y2, so we know that (y1 - y2) is positive. In our example triangle, (x2 - x1) is negative, as x2 < x1. So the above calculation gives us the line gradient in terms of the number that we should add to the x-coordinate as we step up the line from the bottom to the top, and it's negative because we step to the left as we go up the line.
[Aside: For those who are used to line algorithms, this is probably starting to feel a bit like Elite's line-drawing algorithm (see this deep dive in my Elite project for details). The Elite algorithm stores the slope and an associated slope error as we step along a line, drawing it one pixel at a time. However, a lot of the complexity of this algorithm comes from a lack of fractions in 8-bit arithmetic, so we have to keep track of the slope error separately. In Lander we have 32 bits to play with, and that makes things a lot easier, so it's probably easier not to think in terms of Elite's approach, but just to think of the maths instead, as Lander's algorithm is a lot closer to the maths than the optimised 8-bit version.]
The next step, in part 3 of DrawTriangle, calculates the slope for the right edge of the triangle. As a reminder, here's our triangle again:
                             (x3, y3)
                          _,+
                      _,-´ /
                  _,-´    /
              _,-´       /
  (x2, y2)  +´          /
             `.        /
               `.     /
                 `.  /
                   `+
                  (x1, y1)
So we want the slope for the right edge of the triangle, i.e. the line between (x1, y1) and (x3, y3). The calculation used is the same, just with different points:
(y1 - y3) / (x3 - x1)
Again, this gives us the gradient of the line in terms of the number that we should add to the x-coordinate as we step up the line from the bottom to the top, but this time the gradient is positive, as both y1 >= y3 and x3 > x1. This means we step to the right as we move up the line, from bottom to top.
Before we move on to the next step, let's have a quick word about the divisions we just performed, as Lander performs these divisions in one of two ways, depending on the size of the numbers in the calculation.
If both the numerator and denominator are less than 64, then the result is quickly fetched from a lookup table at divisionTable (via the address vector in divisionTableAddr). There are 64 separate lookup tables at divisionTable, each one containing 64 pre-calculated division results for a different denominator (in the range 0 to 63). The first table contains the result when the denominator is 0, so that's 0 / n (for n = 0 to 63). The second table contains the result when the denominator is 0, so that's 1 / n (for n = 0 to 63), the third table contains 3 / n, and so on up to the last table, which contains 63 / n. So when both the numerator and denominator are less than 64, we simply calculate the address of the relevant result in the relevant table, and we can fetch our calculation result.
If either or both of the numerator and denominator are 64 or greater, then the lookup tables don't contain the result we are after, so we have to resort to the shift-and-subtract algorithm. This algorithm is similar in concept to the shift-and-add multiplication algorithm that Lander uses instead of MUL instructions, except this algorithm divides instead of multiplying. See the deep dive on Lander's origins on the ARM1 for more about shift-and-add multiplication in Lander, and see this deep dive in my Elite project for a discussion of the division algorithm (albeit for 8-bit computers).
Now that we have our gradients calculated, let's actually draw our triangle on-screen.
Drawing our standard triangle
-----------------------------
Part 4 of DrawTriangle is responsible for drawing fully on-screen triangles out of horizontal lines. It draws triangles in two parts, effectively slicing the triangle in half along a horizontal line at y-coordinate y2. So our triangle:
                             (x3, y3)
                          _,+
                      _,-´ /
                  _,-´    /
              _,-´       /
  (x2, y2)  +´          /
             `.        /
               `.     /
                 `.  /
                   `+
                  (x1, y1)
gets split into two, to give a top part of the triangle like this:
                             (x3, y3)
                          _,+
                      _,-´ /
                  _,-´    /
              _,-´       /
  (x2, y2)  +´----------+
and a bottom part like this:
  (x2, y2)  +-----------+
             `.        /
               `.     /
                 `.  /
                   `+
                  (x1, y1)
We draw triangles from the bottom up, so we start at the bottom point of the bottom triangle, (x1, y1), and step upwards by one pixel row at a time. As we step up each row, we draw a horizontal line between the two sides, until we reach the level of (x2, y2).
As we move up each pixel row, we need to calculate the coordinates of the left and right ends of each horizontal line. This is easy enough, as we already calculated the gradient for the left and right edges, and the gradient gives us the number that we should add to the x-coordinate as we step up the line from the bottom to the top (so it's a negative number for the left edge and a positive number for the right edge).
So we work our way up from the bottom, stepping through y-coordinates from y1 to y2. We keep two variables for the x-coordinates of the left and right edges (which both start at x1), and for each iteration we add the left edge's gradient to the left edge's x-coordinate, and we add the right edge's gradient to the right edge's x-coordinate. On each y-coordinate we draw a horizontal line from the left edge to the right edge, before repeating the process.
To ensure accuracy, we use the full 32 bits at our disposal. The two gradients are very unlikely to be whole numbers, so in all the line calculations, we store numbers with the top 16 bits representing the integer part, and the bottom 16 bits representing the fractional part. This enables us to keep adding the potentially fractional gradients to the x-coordinates, and when drawing each pixel line, we just take the top 16 bits to get the resulting x-coordinates as integers. The bottom 16 bits retain the fractional part, so when we add the gradient again for the next pixel line up, the calculation retains accuracy. There is no need to keep a separate variable for the "slope error", as we have enough accuracy in the ARM's 32-bit word size already.
So we keep drawing horizontal lines, until we reach the halfway point in our split triangle. At this point we need to start drawing the top triangle, which looks like this:
                             (x3, y3)
                          _,+
                      _,-´ /
                  _,-´    /
              _,-´       /
  (x2, y2)  +´----------+
At this point we calculate the gradient of the line from (x2, y2) to (x3, y3). In our example triangle this is the left edge, but it could equally be the right edge - the maths is the same whatever the layout. We calculate the gradient using a familiar-looking division:
(y2 - y3) / (x3 - x2)
As before, this gives us the gradient of the line in terms of the number that we should add to the x-coordinate as we step up the line from the bottom to the top. In our example triangle this gradient is positive, as both y2 >= y3 and x3 > x2. This means we step to the right as we move up the line, from bottom to top.
It's now a simple case of drawing the top triangle using the same approach as before, working our way up one pixel row at a time, but this time we add our newly calculated gradient to the left edge of the horizontal line, so it moves along the line from (x2, y2) to (x3, y3).
This same approach is used to draw all the different types of triangle in Lander, just with subtle differences for the edge cases (for example, the line-drawing routine for clipped triangles includes checks to make sure lines aren't drawn off-screen, but otherwise it's pretty similar). Quadrilaterals, meanwhile, are simply drawn as back-to-back triangles of the same colour, via the DrawQuadrilateral routine.
So DrawTriangle is easily the biggest routine in Lander, especially if you include the division lookup table, which is exclusively used by the triangle routine. But at its core it's a relatively simple process, it's just unrolled into lots of edge cases with very similar code.